This document will help you attach your Impact Analytics Pixel to display creatives that are running in your DV360 Display campaign. You can track impressions on both the 3rd Party Display type and Hosted Display type of creative.
If you need any help with creating your Analytics Pixel, please read the “Generating Your Impact Analytics Pixel” guide.
Impact Analytics Pixels are added at the Creative level under your Advertiser in DV360.
Adding Impact Analytics Pixels to 3rd Party Tags in DV360
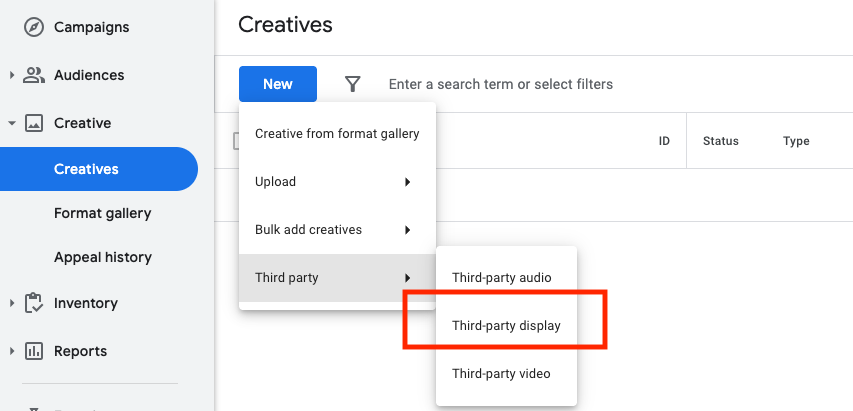
- Within your DV360 Advertiser, click on the “Creatives” tab in the left column, then “New Creative” to open the new creative popup.
- Click on “Third Party Tag” in the dropdown menu.
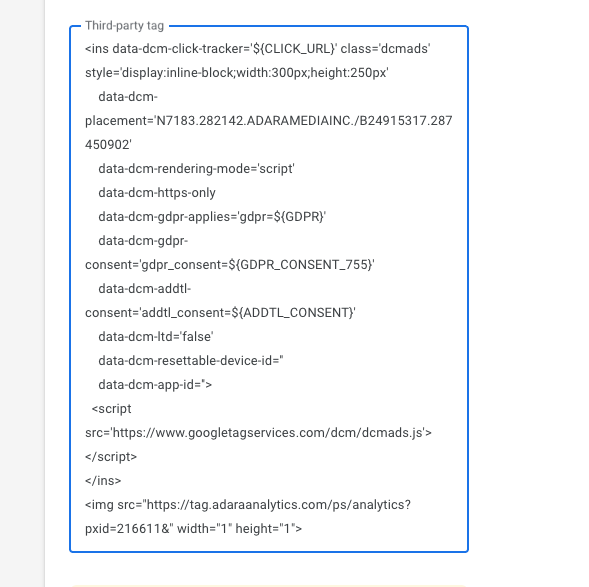
- Paste in your tag in the "Third-party tag" section (this works for any type of tag: Iframe, JavaScript), and add the Image Format Impact Analytics Pixel to the end of the creative code as shown below.
- Enter in the respective details in the remaining fields.
- Save.
Appending the Impact Pixel to Hosted Display Images
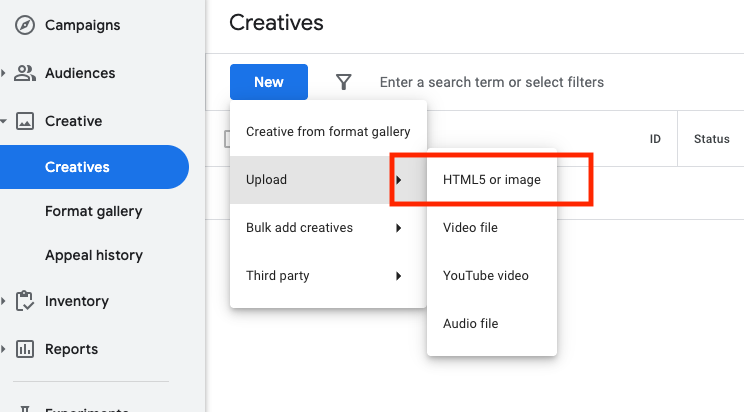
- Within your DV360 Advertiser, click on the “Creatives” tab in the left column, then “New Creative” to open the new creative popup.
- Click on the “HTML5 or image” in the dropdown menu to begin submitting a hosted creative.
- In the “Basic Details” section, choose the file you’d like to upload and add a landing page. Click “Upload” when completed.
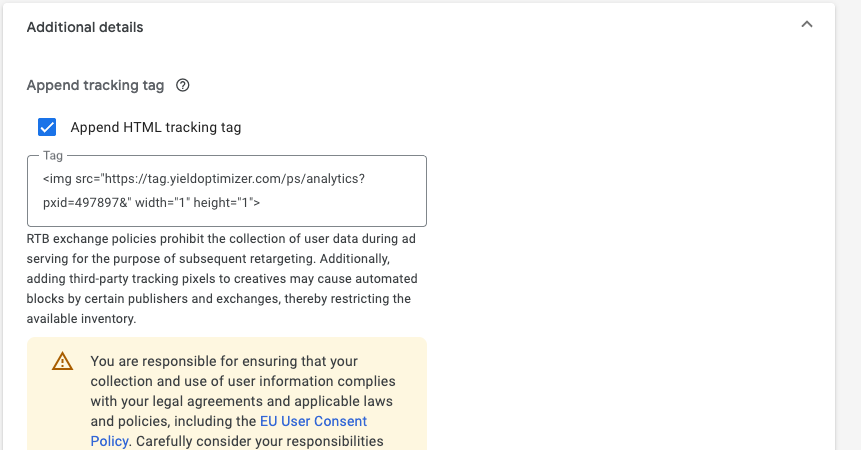
- Within “Additional Details”, check the “Append additional HTML tag” box and click “Add HTML.” Copy your Analytics pixel HTML code and paste it into the “Tag” field.
- Enter in the respective details in the remaining fields.
- Save.
Verify Your Pixel is Firing
Within DV360, to verify that the Impact Analytics Pixel is firing properly, you can click on the creative preview and look in a browser extension such as Ghostery to see the pixel firing.
After launching or test-firing your campaign, check the Pixel setup page in Impact. Two columns show:
- Total lifetime number of impression fires
- Last fired timestamp
Was this page helpful?