These page contain 3 tab: Website Pixels, Media Pixels, Click Trackers
Website Pixels Tab
View and manage all of your Impact Website Pixels on this page. Website Pixels are for use in tracking your website visits and linking these visits to travel activity.
Last Fired shows you the date when a particular Website Pixel was last fired, helping you determine whether the pixel is Active or is no longer in use.
Total Impressions, which essentially represents "page views" for a website implementation, shows you the total firings for a particular Website Pixel over time. This number is an easy reference while testing pixel placement.
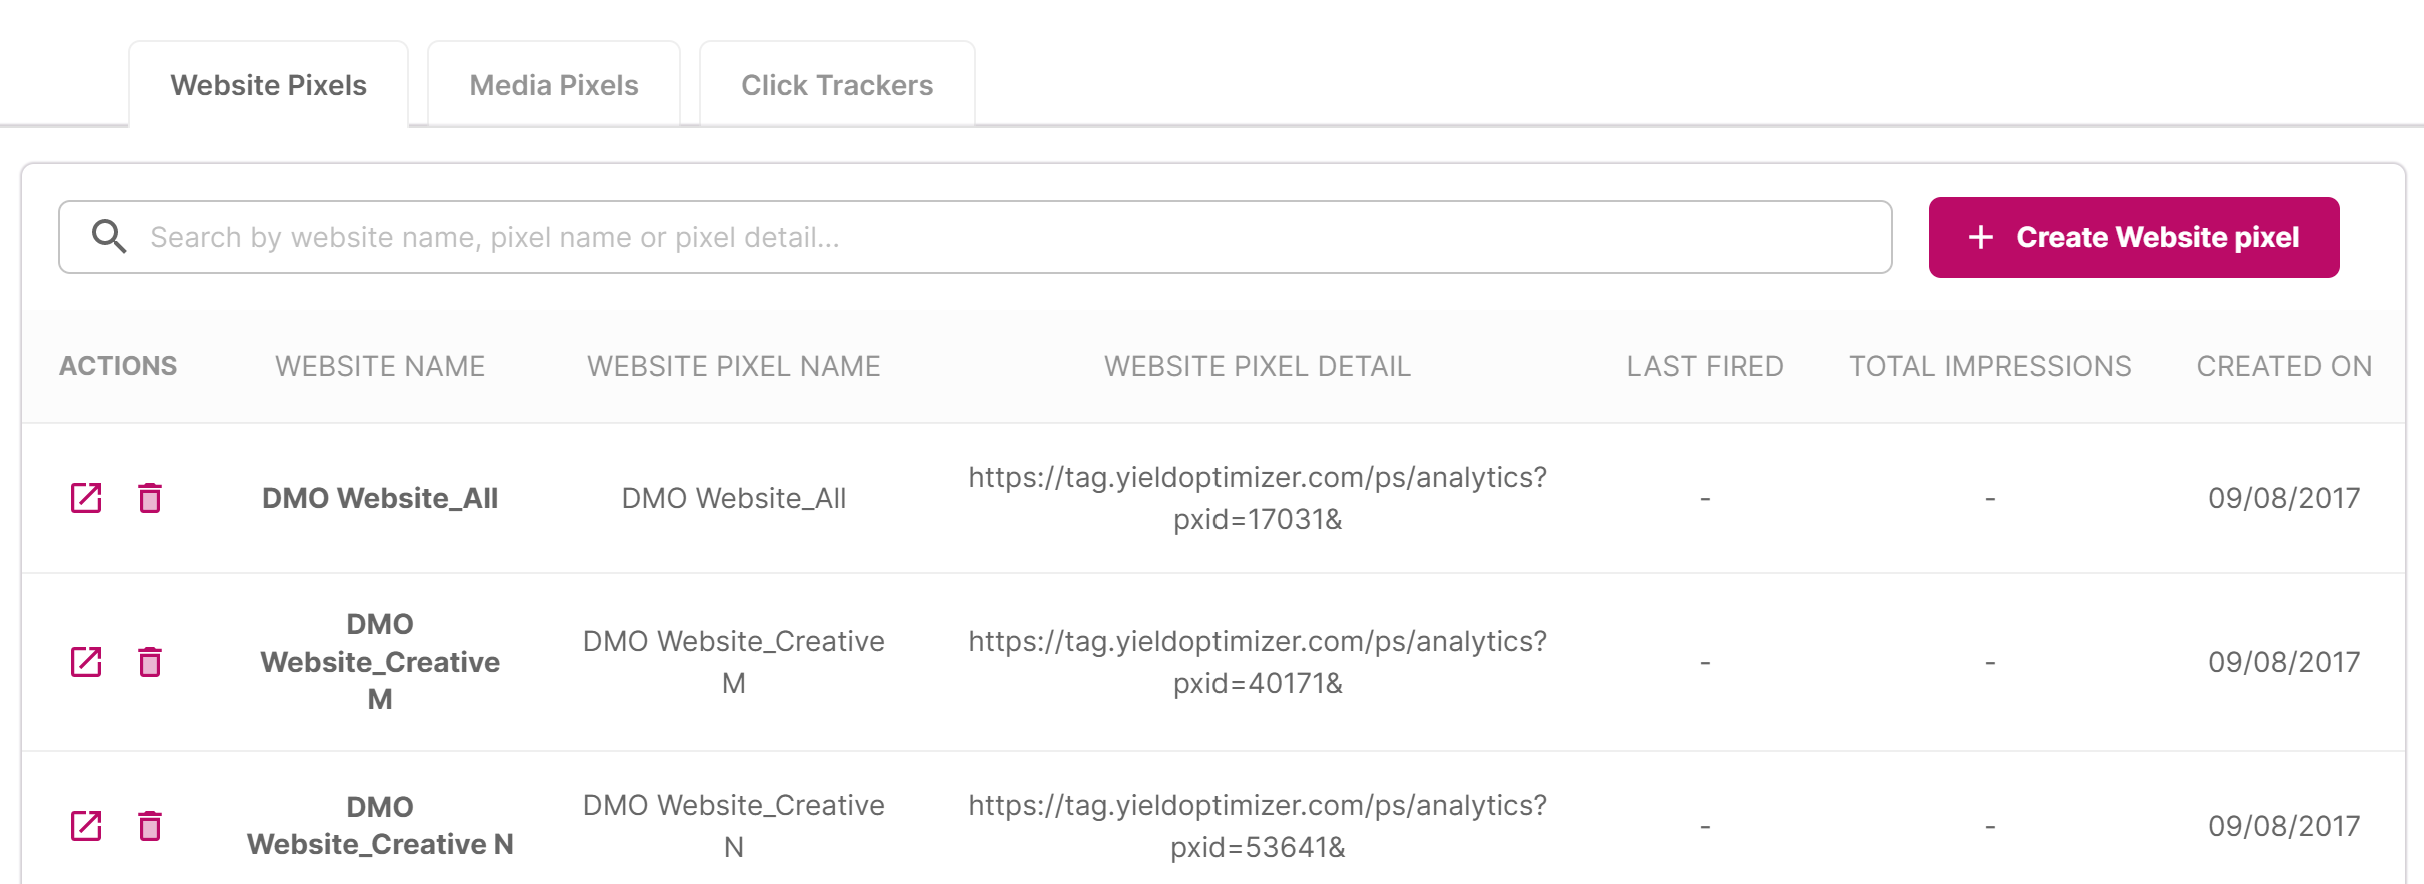
Website Pixels
Create Website Pixel
Create new Website Pixel by clicking Create Website Pixel button, it opens a popup containing two fields: Website Name and Website Pixel Name. You can also click on "Generate Website Pixel" to review or copy the pixel.
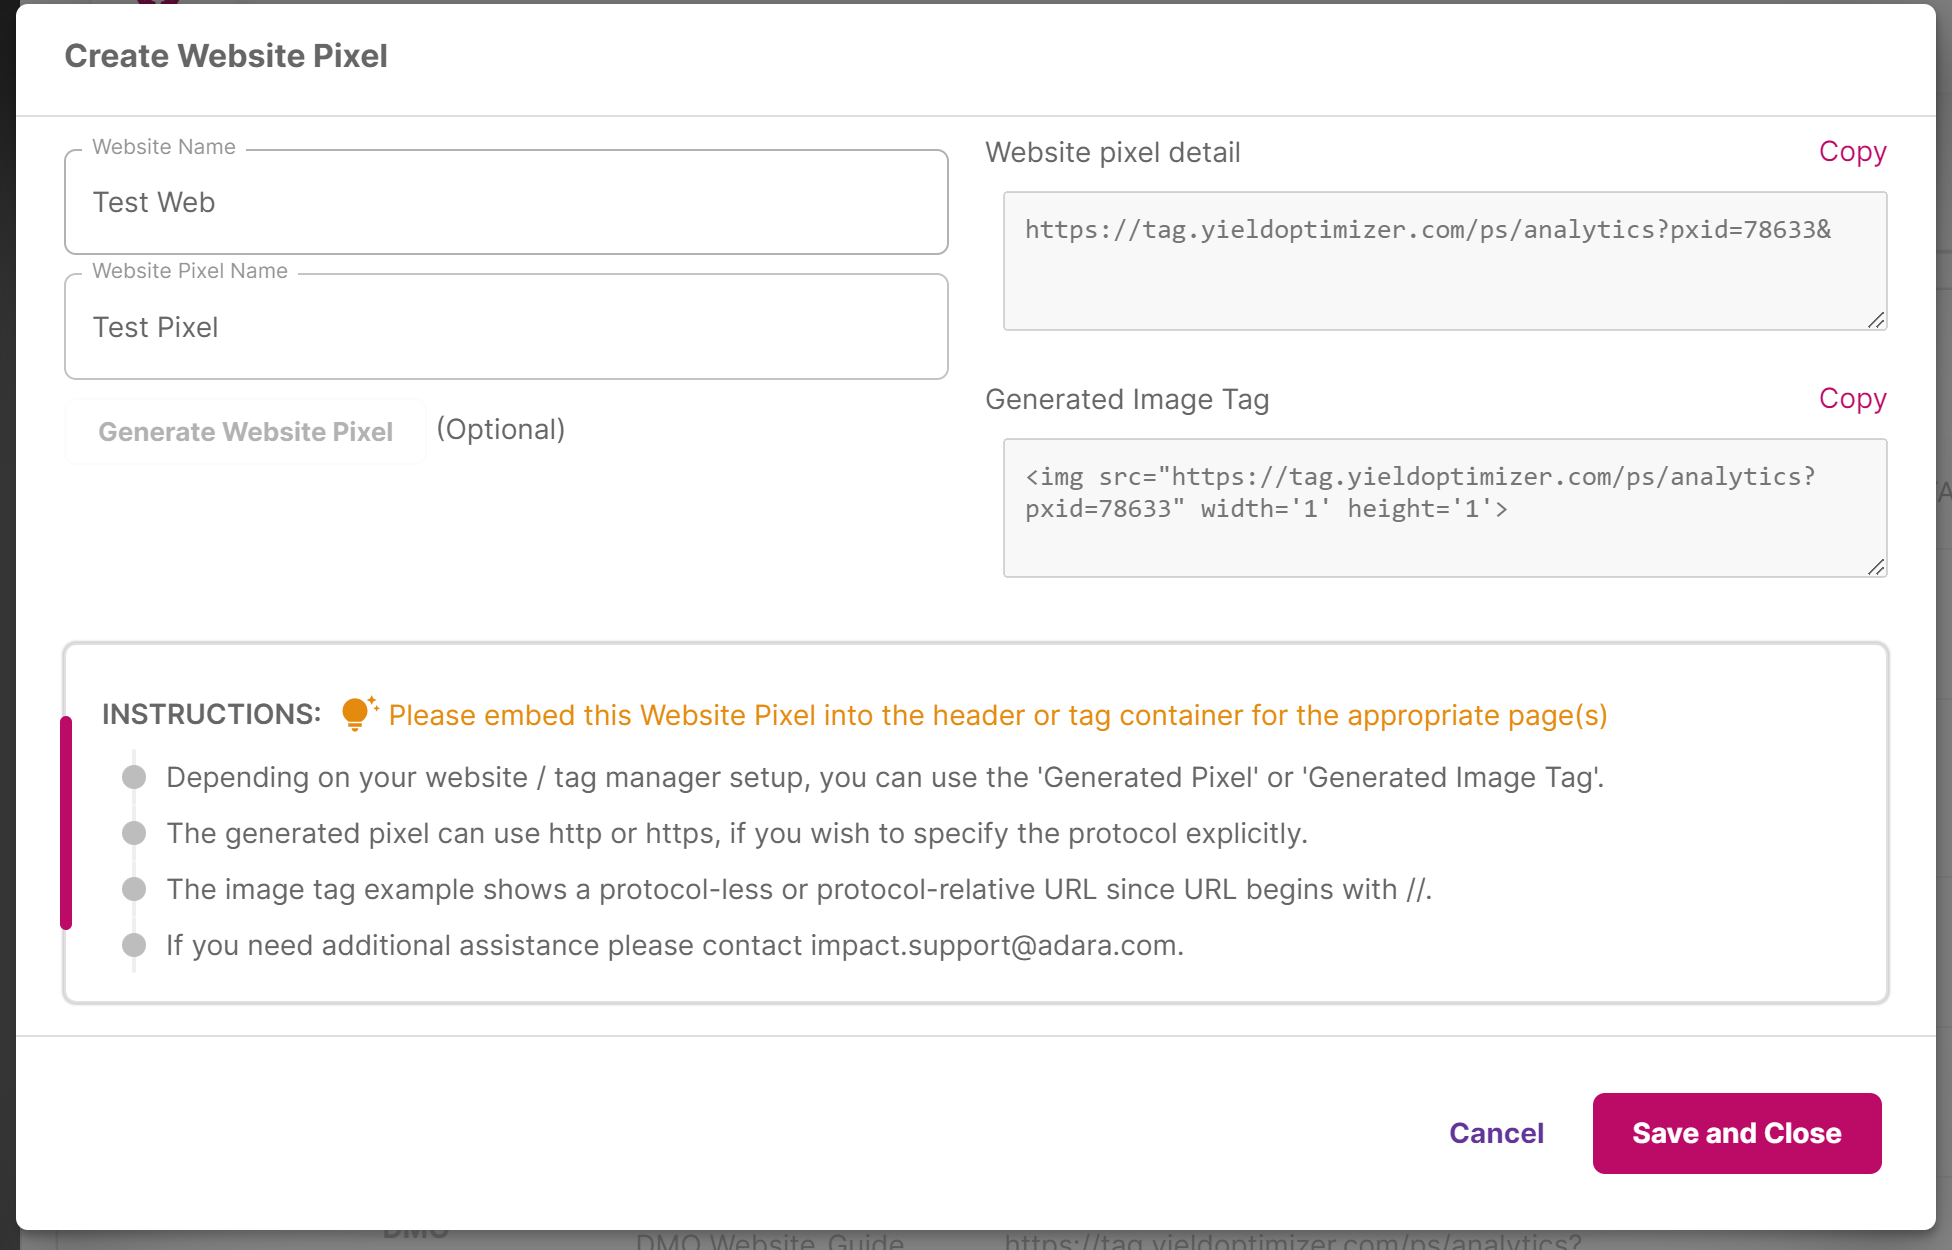
Create Website Pixel
Users can also edit or delete particular pixel by clicking on action items.
Media Pixels Tab
View and manage all of your Impact Analytics Pixels on this page. Analytics Pixels are for use in tracking your media impressions and linking these impressions to travel activity.
Last Fired shows you the date when a particular Analytics Pixel was last fired, helping you determine whether the pixel is Active or is no longer in use.
Total Impressions shows you the total firings for a particular Analytics Pixel over time. This number is an easy reference while testing pixel placement.
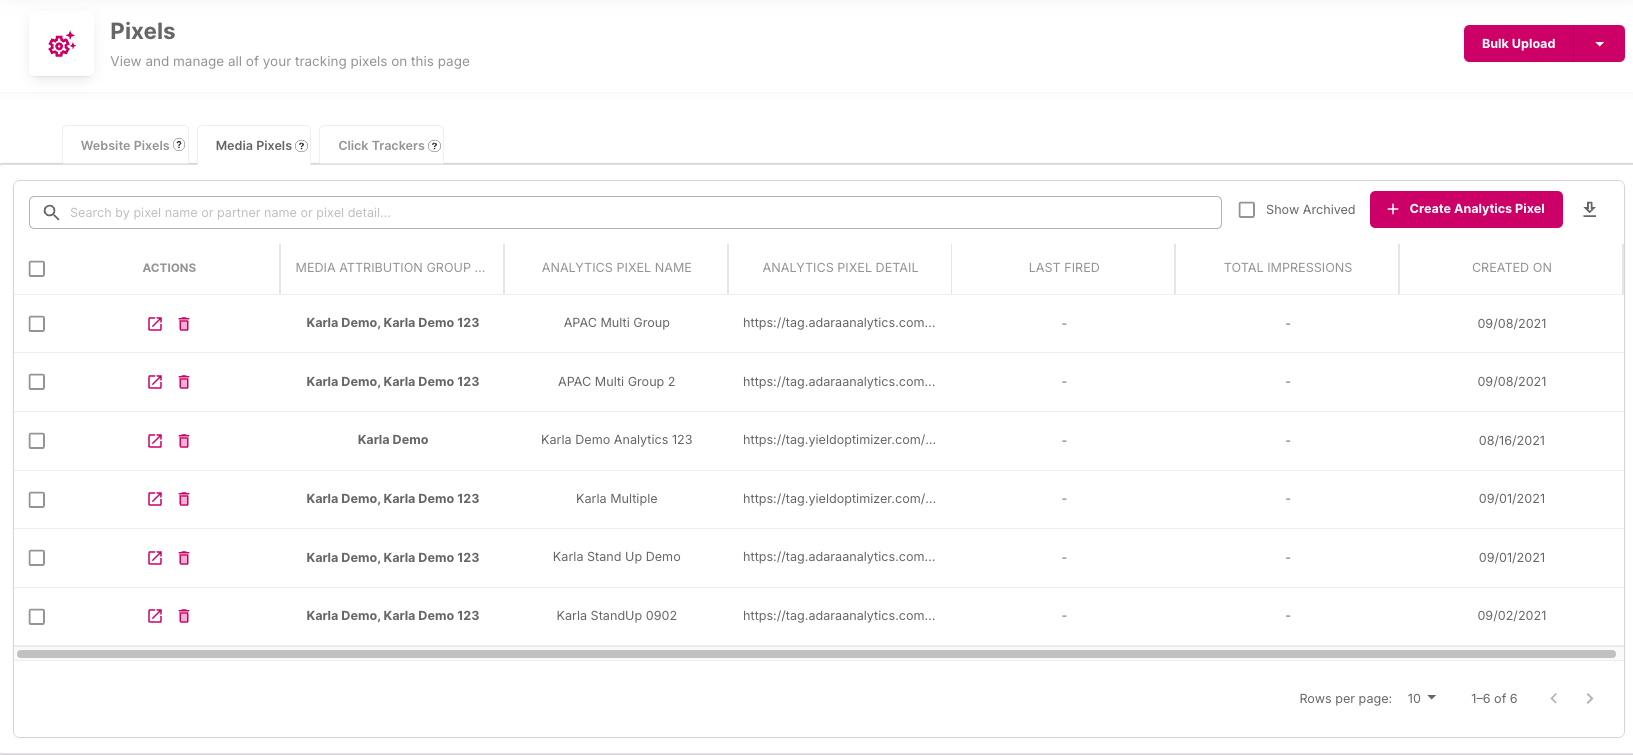
Media Pixels
Create Analytics (Media) Pixel
To generate your Analytics pixel, log into your Impact account.
Select the relevant Advertiser from the top right drop-down menu, then click on View Impact Setup.
If required, navigate to your Attribution Groups and create a new Attribution Group before creating your Analytics Pixel.
Click on the Media Pixels tab, then click on the Create Analytics Pixel button.
After clicking on New Analytics Pixel, a modal will appear where you will create your new Analytics pixel. Select your Attribution Group from the drop down menu and give your new pixel a name.
- You can click on Generate Analytics Pixel button and it will show you the pixel on the modal and you can copy & paste.
- You can click on Save and Close button and it will create the pixel and close the modal. You can copy it from the table in the Pixel Set Up page.
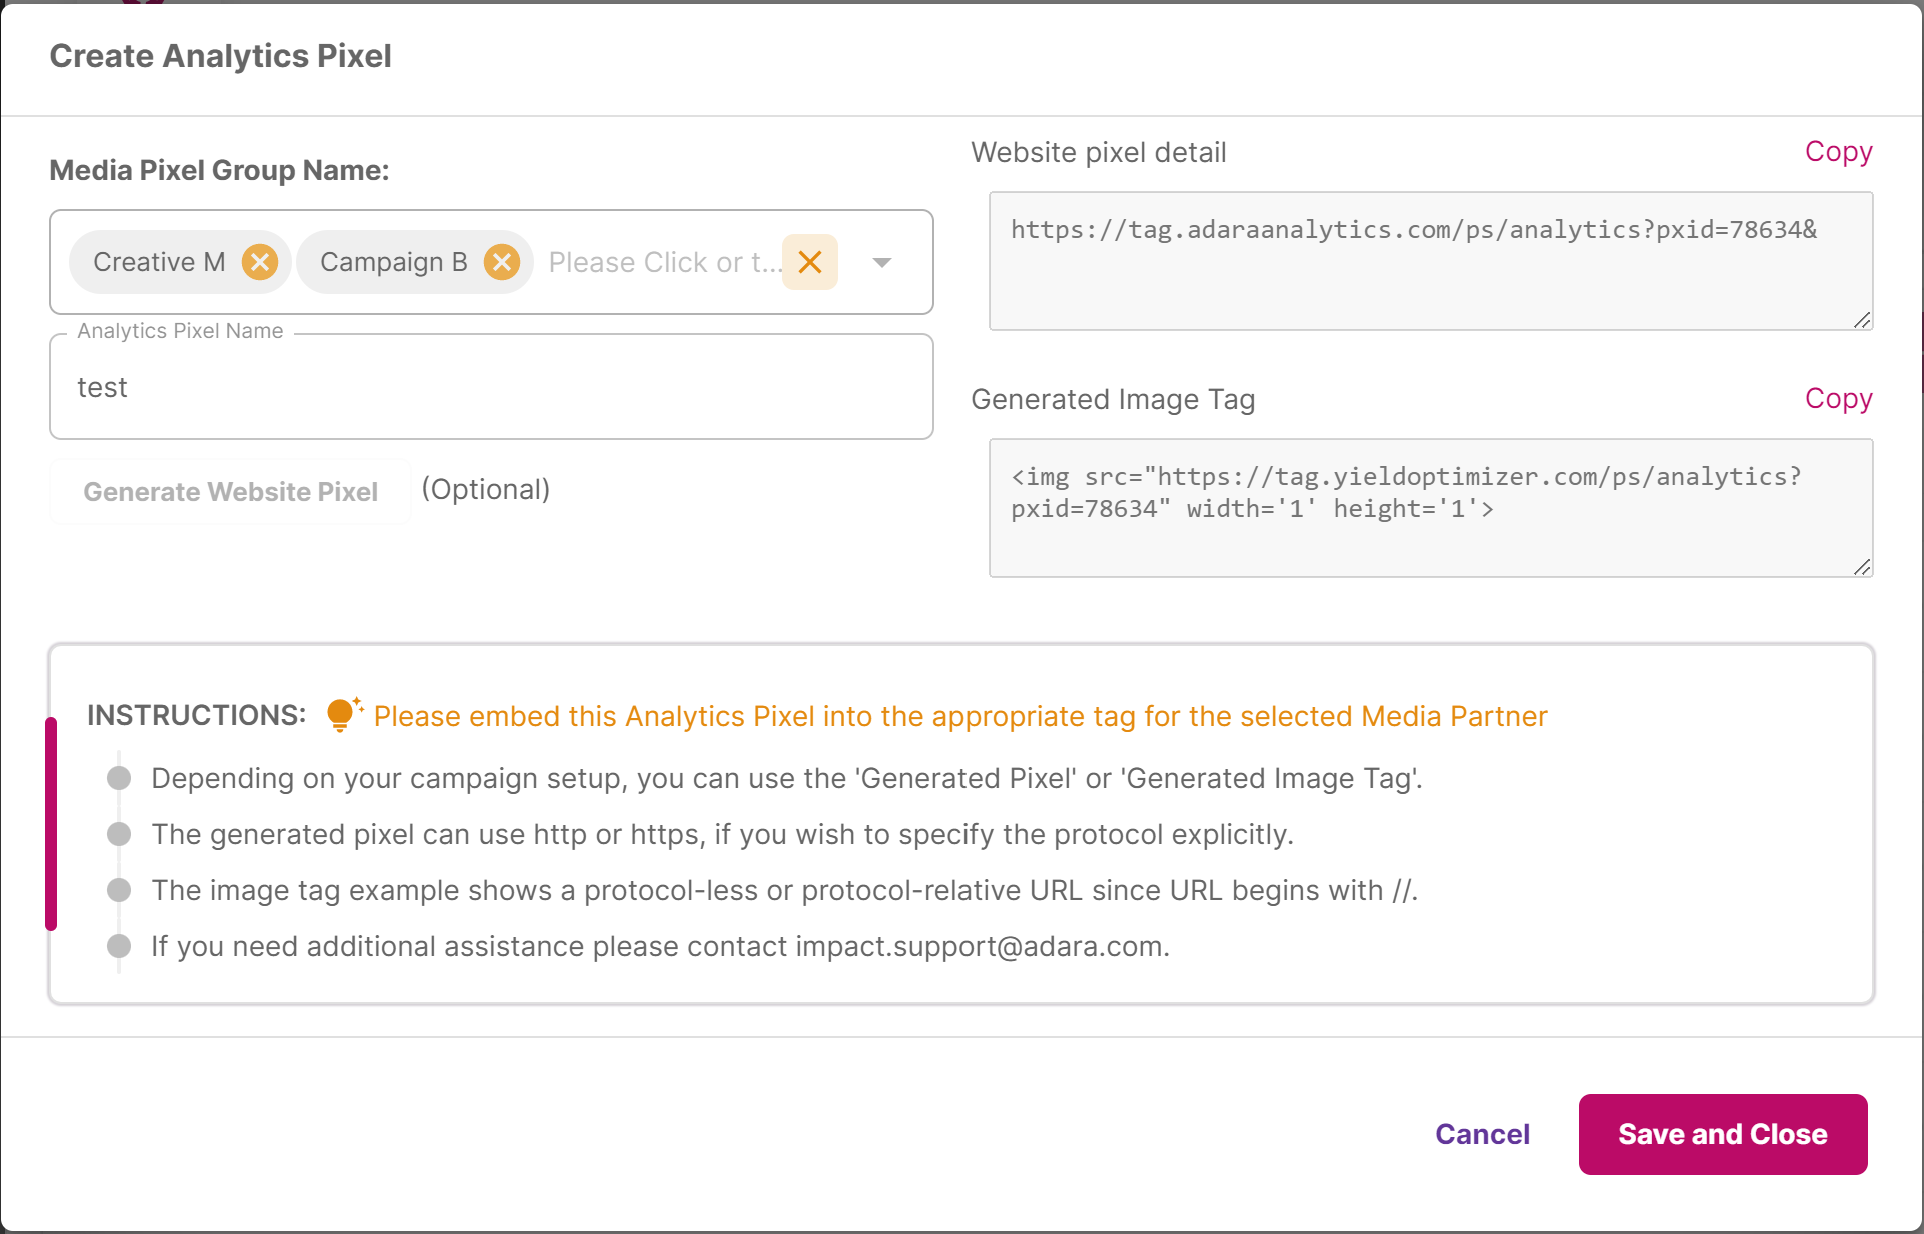
Create Analytics Pixel
Users can also edit or delete particular pixel by clicking on action items.
Click Trackers Tab
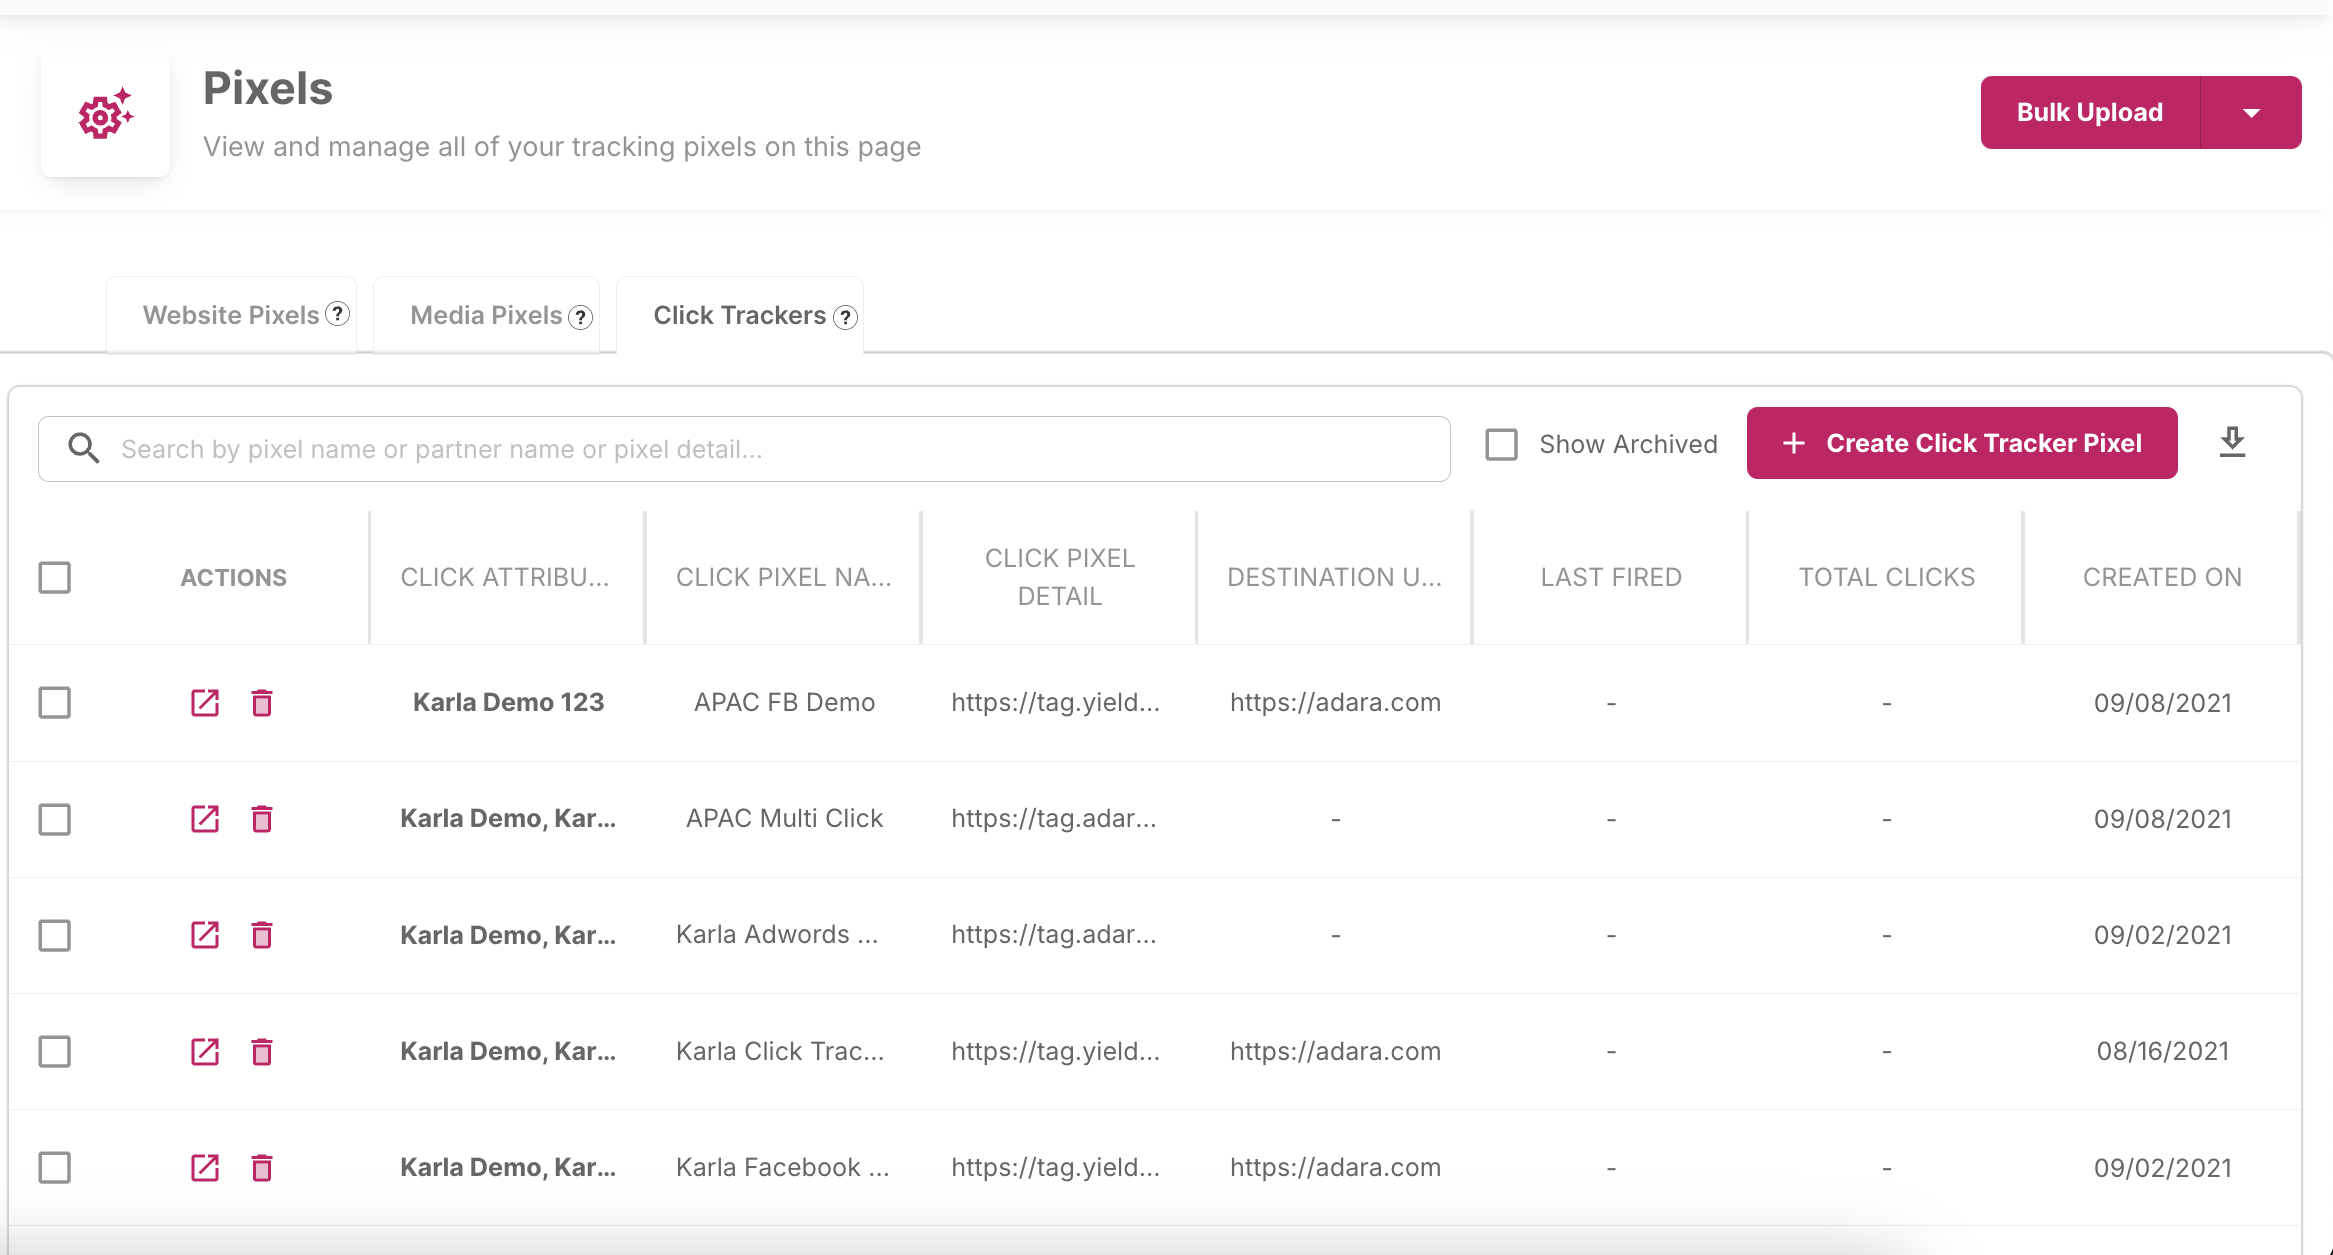
Click Trackers List
Create Click Tracker Pixel
To generate your Analytics pixel, log into your Impact account.
Select the relevant Advertiser from the top right drop-down menu, then click on View Impact Setup.
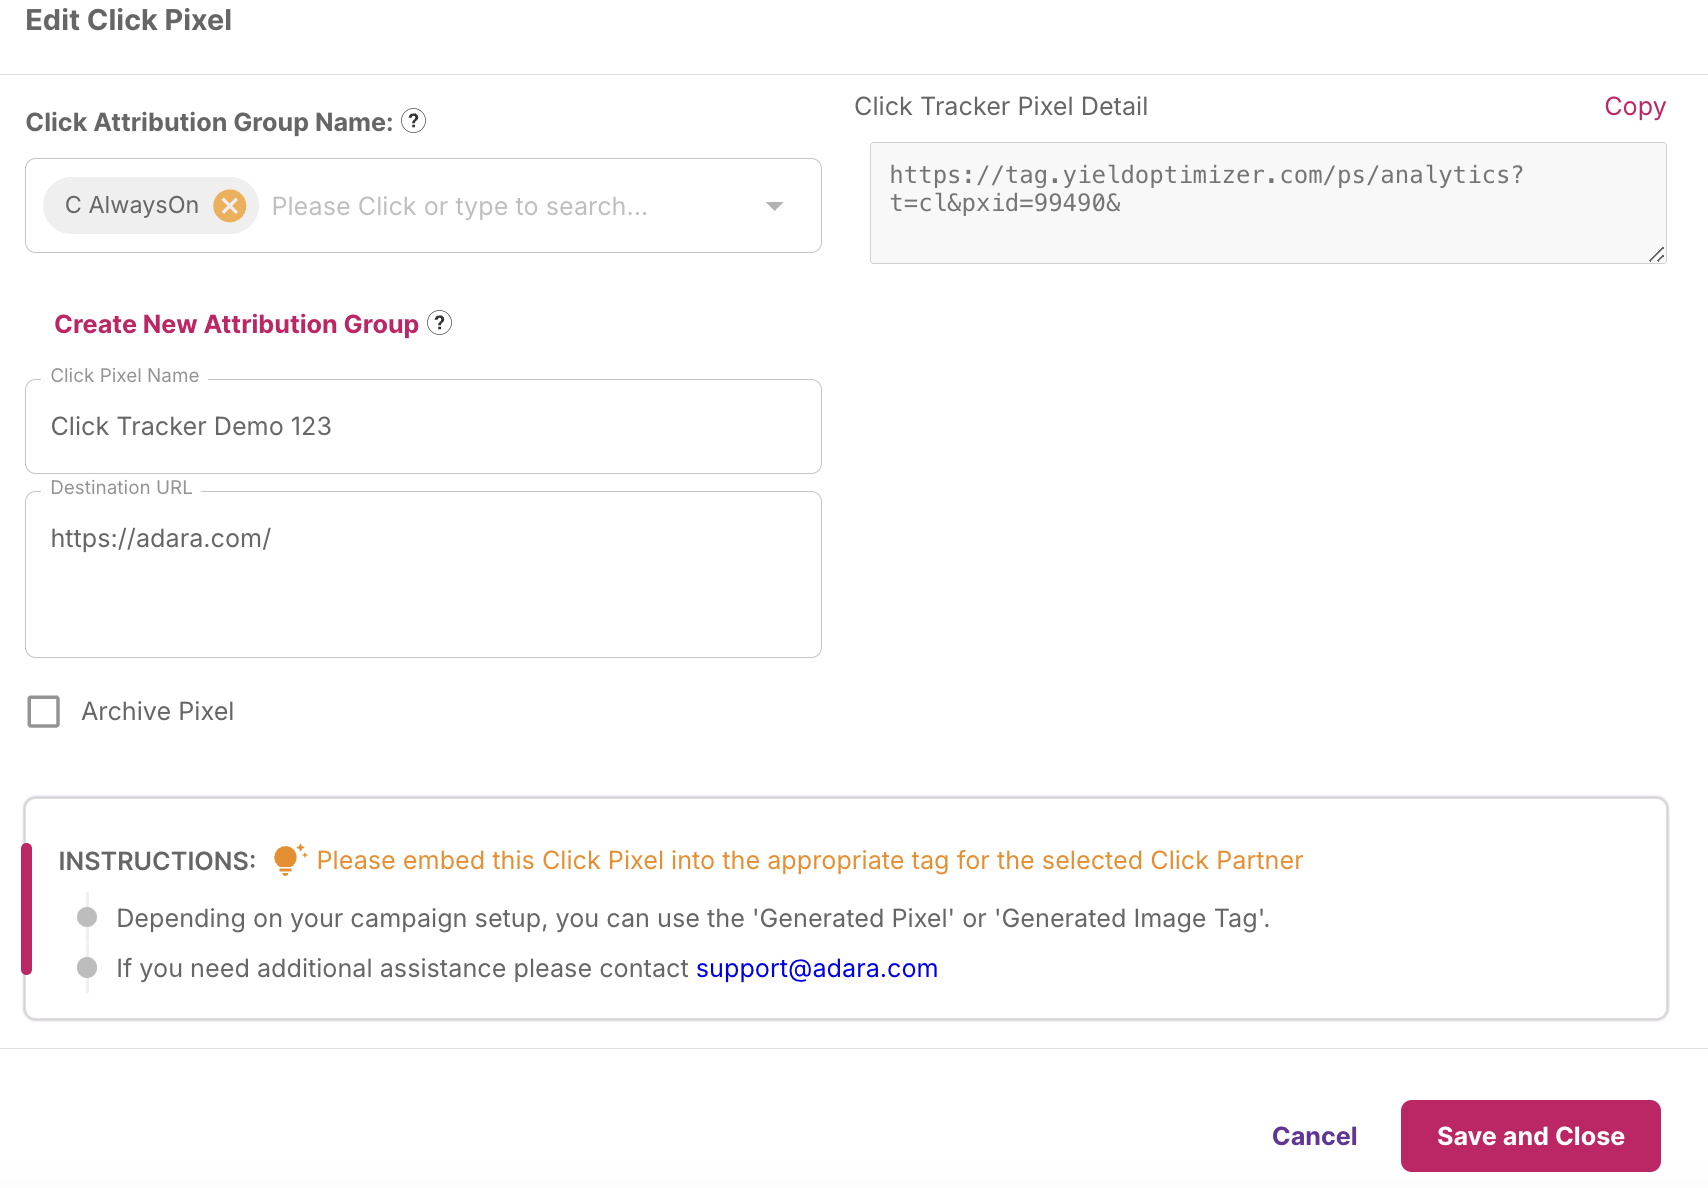
If required, navigate to your Attribution Groups and create a new Attribution Group before creating your Click Tracker.
Click on the Click Trackers tab, then click on the Create Click Tracker Pixel button.
After clicking on Create Click Tracker Pixel, a modal will appear where you will create your new Click tracker. Select your Attribution Group from the drop down menu and give your new pixel a name.
In the
- You can click on Generate Click Tracker button and it will show you the click tracker on the modal and you can copy & paste.
- You can click on Save and Close button and it will create the pixel and close the modal. You can also copy it from the table in the Pixel Set Up page.
Users can also edit or delete particular pixel by clicking on action items.
Create Click Tracker